Getting started with your Ilion II system
- Plug in cables per the installation instructions from the Getting Starting Guide.
- If the system has an optical microscope, install it and the PC.

A. Connect the monitor, mouse, and keyboard to the PC. Place the monitor, mouse, and keyboard next to the instrument on the bench. Plug in the power cables for the PC and the monitor.
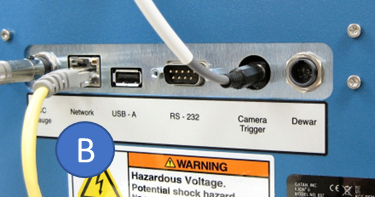
B. Connect the ethernet cable between the Network connection on the back of the instrument and the Network port on the rear of the PC labeled To ion beam instrument. This is an add-in board. The other network connection can be connected to the internet for remote access.

C. Slide the rack and pinion mount onto the post on the top of the instrument.
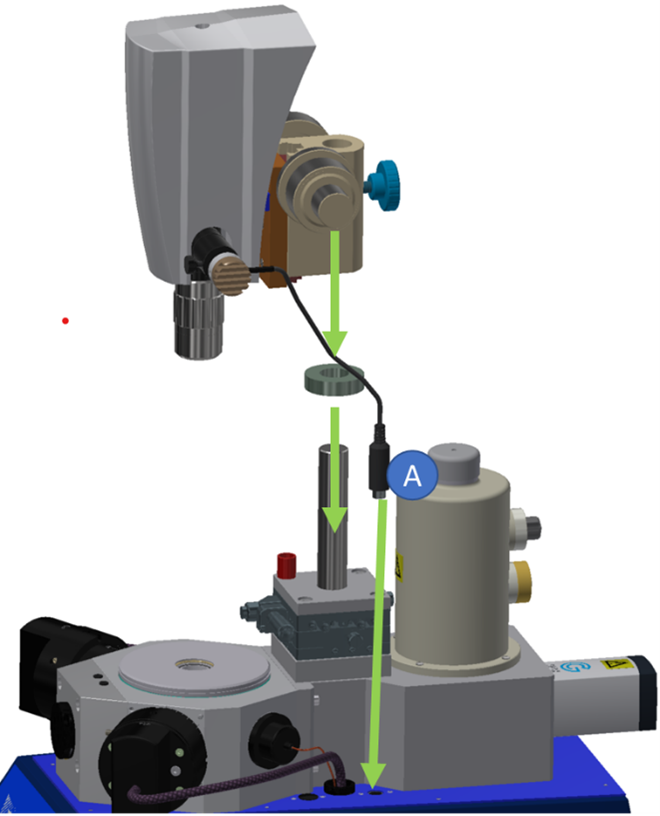
a. Plug cable A (from the first picture above) into the connector on the top right of the cabinet, as shown.
b. Plug cable B into an available USB port of the imaging PC.
c. Plug cable C into the Camera Trigger port on the back of the instrument.
- Check for a gas-line leak.
- Turn on the power switch directly above the power cable.
- Purge the argon gas line.
- Disconnect the argon hose from the back of the tool.
- Set the flow rate to 172 kPa (25 psi).
- Open the flow valve and let the argon run through the hose for a minute.
- With the argon still flowing, reconnect the hose to the back of the tool.
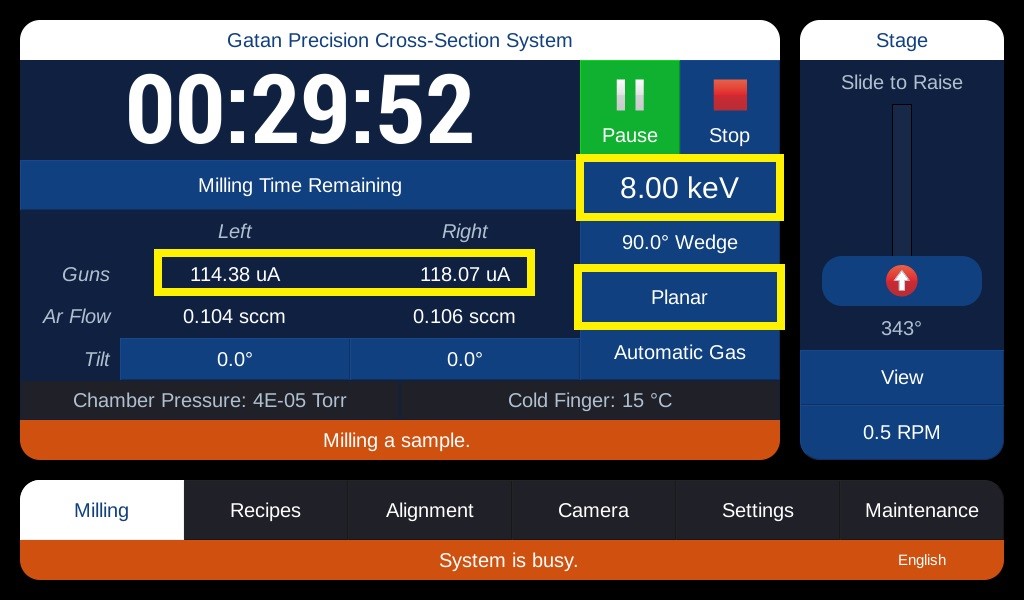
- Confirm the guns are ready.
- Start milling at 8 kV, planar.
- Confirm both guns have an accelerating current above 20 µA.
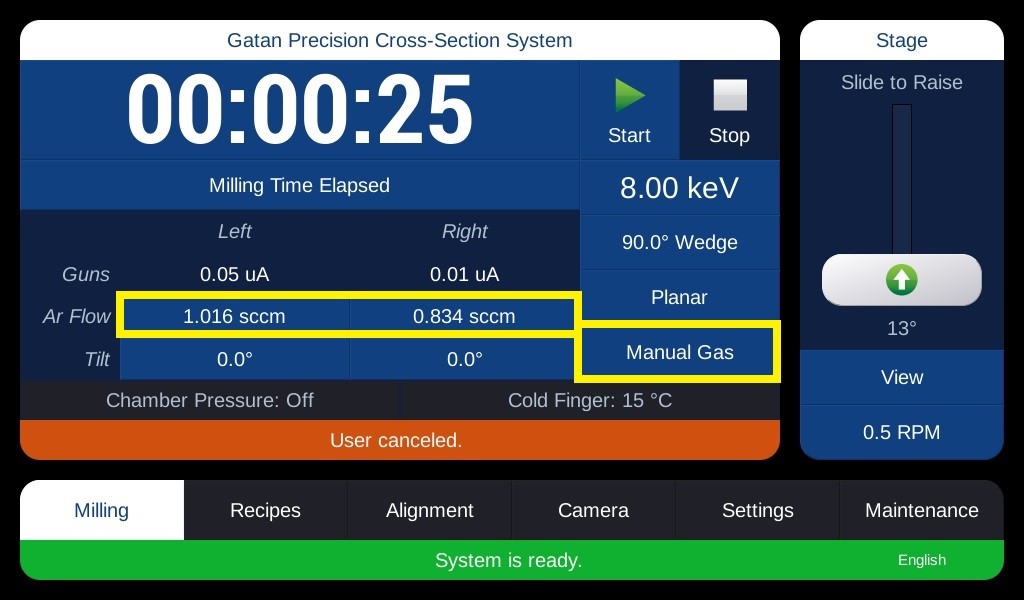
- Stop milling.
- Purge the guns overnight.
- Disconnect the cold cathode gauge.
- Set the gas flow to Manual.
- Set both guns to 1 sccm.
- Leave to purge overnight.
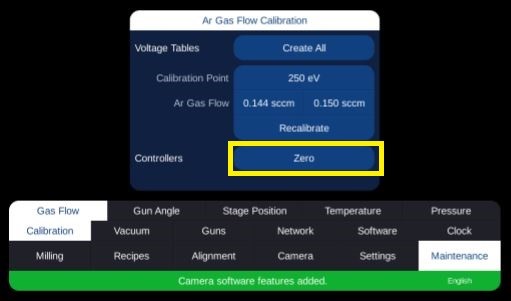
- Zero the mass flow controllers.
- Set the gas flow to Automatic.
- Push Zero.
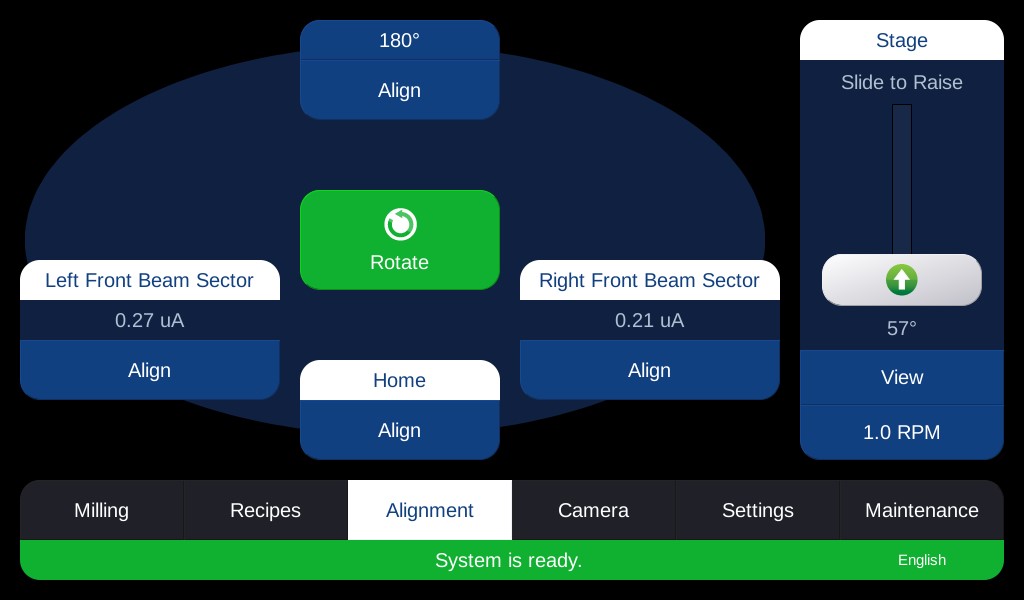
- Align the guns.
- Insert the alignment screen.
- Align guns at 0°.
- Use the left front beam sector or right front beam sector to align the left and right guns, respectively.
- Center the beams to the feature in the center of the alignment screen.

- Mix silver paint.
- There is a massive clump in the bottom of the bottle that needs to be vigorously mixed with the solvent; you only need to do this once.
- Mount a sample by following the video below, and you are ready to mill.