Day one instructions for your Elsa cryo-transfer holder
- Unpack and verify that the following parts are present: the Elsa™ cryo-transfer holder (model 698), the temperature controller (model 1905), the cryo-transfer workstation (P/N 698.TFR), and the valve upgrade kit (P/N 698.655UPG).
- (If required) Install the valve upgrade kit (P/N 698.655UPG) onto your existing turbo pumping station (model 655, see 655.12000 Valve Installation Instructions).
- Place the temperature controller next to the turbo pumping station.
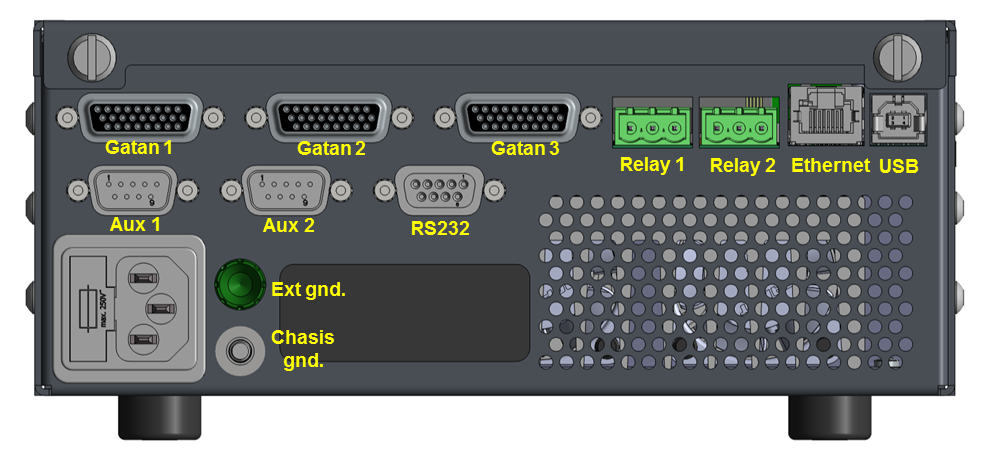
- Connect the standard cable to the connector labeled “Gatan 1” in the shown drawing:
- Connect the power cable to the temperature controller and plug into the wall.
- Turn on the temperature controller by briefly touching the button shown below:

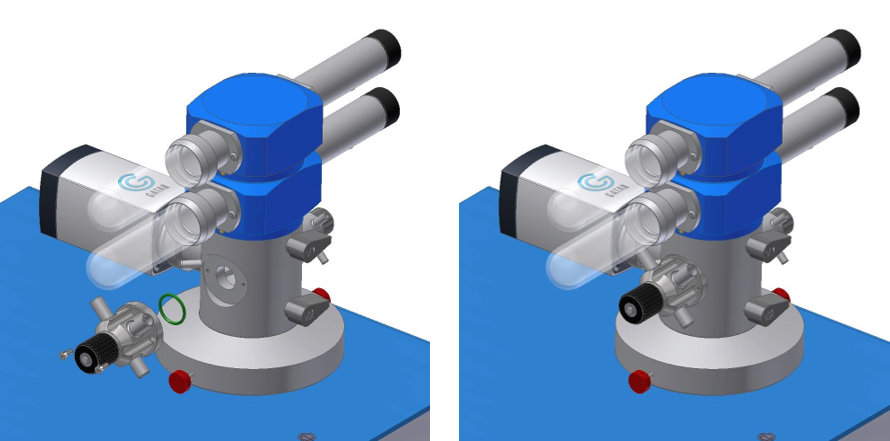
- Insert the holder into the turbo pumping station.
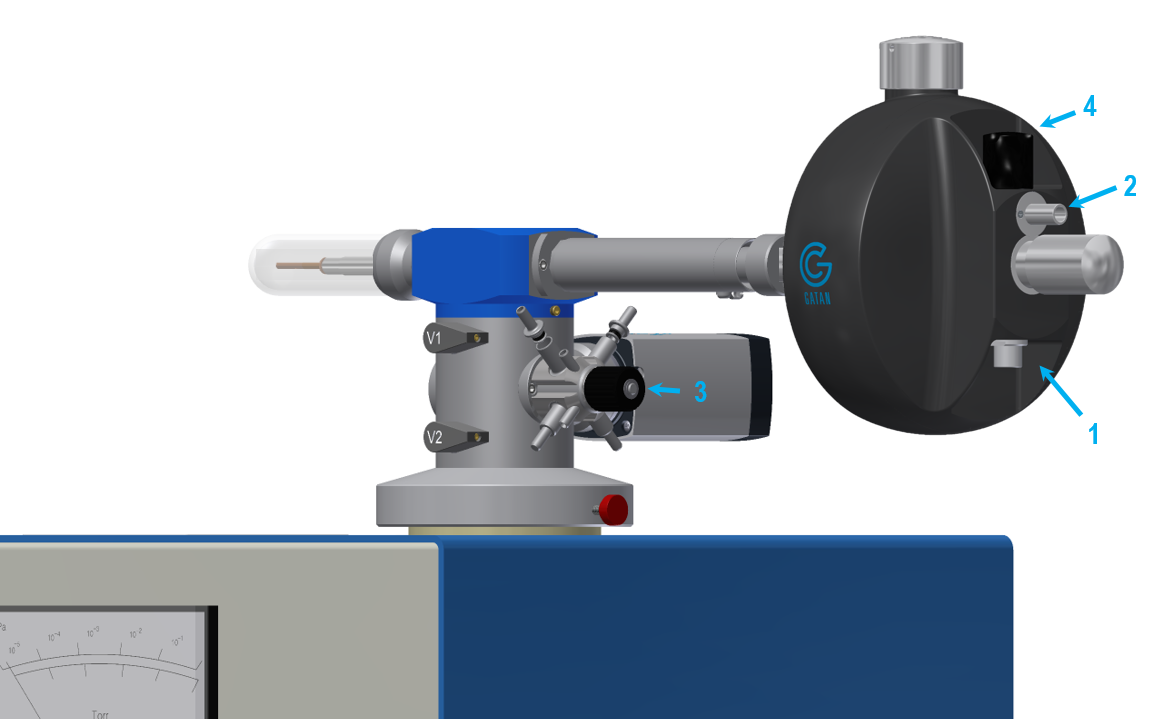
- Connect the standard cable to the end of the Elsa holder (#1). Then attach the pumping tube to the port on the Elsa holder (#2), open valve #3, then open valve #4.
- Turn on the turbo pumping station.
- Using the menu on the temperature controller, set the system to bake out, then leave overnight.
- In the morning, first, close valve #4, then turn off the pumping station and remove the holder for its first use.